Step One:
Stare at the chair wondering how on earth I’m going to attack such a project wishing I was rich and could hire an upholsterer but knowing even if I was rich, I’d probably want to tackle this project on my own ’cause I’m like that.
Step Two:
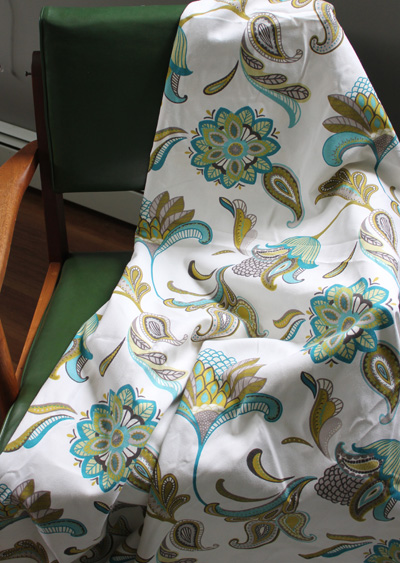
Lay the fabric across the chair quite pleased with myself that after searching every fabric store in town, I jumped on-line with a “what the heck” attitude, crossed my fingers and ordered a fabric without seeing it and without knowing anything about the company I was ordering from! THRILLED that it arrived two days later and cost me less than half what it would have cost at the local stores (www.fabric.com)
Step Three:
Remove screws while being careful that the entire piece not collapse in on itself and fall on my head.
Step Four:
Notice the dead little baby bugs in the corner of the chair and freak out a little causing my dog to barrel into the room to save me which then caused the chair to fall apart and land on the dog.
Step Five:
Get the dog a treat. Try to convince her that chairs don’t attack. Thank her for protecting me from the tiny dead bugs.
Step Six:
Stare at the collapsed chair and wonder again what the heck I was thinking.
Step Seven:
Search for needle nosed pliers to remove the hoards of rusted staples in the old green vinyl fabric. Decide that a kitchen steak knife is an appropriate tool. Remove all staples being careful not to fling them into my eye or across the floor remembering all too well last weeks snafu of stepping on a tack.
Step Eight:
Answer a text from Crazy asking if we’re taking a cab downtown tonight and what time we would be going out. Notice that she didn’t ask me what I was currently doing and recognizing the simple fact that she doesn’t want to know…as she doesn’t want to make excuses for why she’s not helping.
Step Nine:
Smile momentarily about the amazing girlfriends in my life even when they think I’m nuts for taking on these projects as I fully agree with them.
Step Ten:
Carefully remove the sign from the last company that “professionally” reupholstered the chair many years before and thinking that maybe, when I’m done, I’ll put it back on!
Step Eleven:
Unwrap the fabric from the cushion seat and again…wonder what the heck I’m doing.
Step Twelve:
Lay out the fabric on the table, place the seat on top, staple one staple in all four sides then flip the seat cover over to see what it would look like when it’s done. Wish it was done.
Step Thirteen:
Begin at the corners. Treat it like wrapping a present and remember how when I was a little girl, my favorite thing about Christmas was going to my Nanny and Poppy’s house on Newtown Road and helping my Aunt Mary Lou and my Aunt Jo wrap all of the presents for the family that were all spread out in the spare bedroom. (The presents, not the family…that’s just weird.)
Step Fourteen:
Complete one corner and admire my handiwork while knowing there’s still three more corners before I can call it done.
Step Fifteen:
Finish the second corner, cut off the extra fabric and begin placing staples along the underside of the chair
Step Sixteen:
Run out of staples.
Step Seventeen:
Head to the garage and stare at the mess of tools that I’ve thrown to the floor over the last few days thinking I should really get Spiderman to clean up the mess. Discover the lost needle nosed pliers but realize I have no spare staples. That I can tell. (But apparently I have LOTS of Muskol!)
Step Eighteen:
Wonder if Muskol wards off ticks while remembering that I had to deal with BOTH Ticks AND Tacks last week.
Step Nineteen:
Call it a day. Decide to head to Home Depot to buy more staples and the paint needed to finish the armoire knowing while out, I’ll sidetrack to a few shops to look for something to wear this evening!
Step Twenty:
Promise I’ll finisht the chairs and armoire this weekend…and show you the results real soon!


